


How to Tie a Tie: A Step-by-Step Guide for the Perfect Knot
Tying a tie might seem like a simple task for some, but for many, it can be quite a daunting challenge. Whether you’re preparing for a job interview, attending a formal event, or simply want to add a touch of elegance to your outfit, mastering the art of tying a tie is essential. In this article, we will guide you through the process of tying a tie, step by step, to help you achieve the perfect knot with ease.
1. Choosing the Right Tie
Before we dive into the tying process, it’s essential to choose the right tie for the occasion. Consider the type of event, your outfit’s color, and your personal style. Silk ties are classic and versatile, while knit ties offer a more casual look.
2. Preparing the Tie
Lay the tie flat on a clean surface, and ensure the wider end is on your right and the narrower end on your left. Make sure the tie’s seam faces inward.
3. Finding the Proper Length
The ideal length of the tie will depend on your height and the desired knot size. Experiment with different lengths to find the perfect balance.
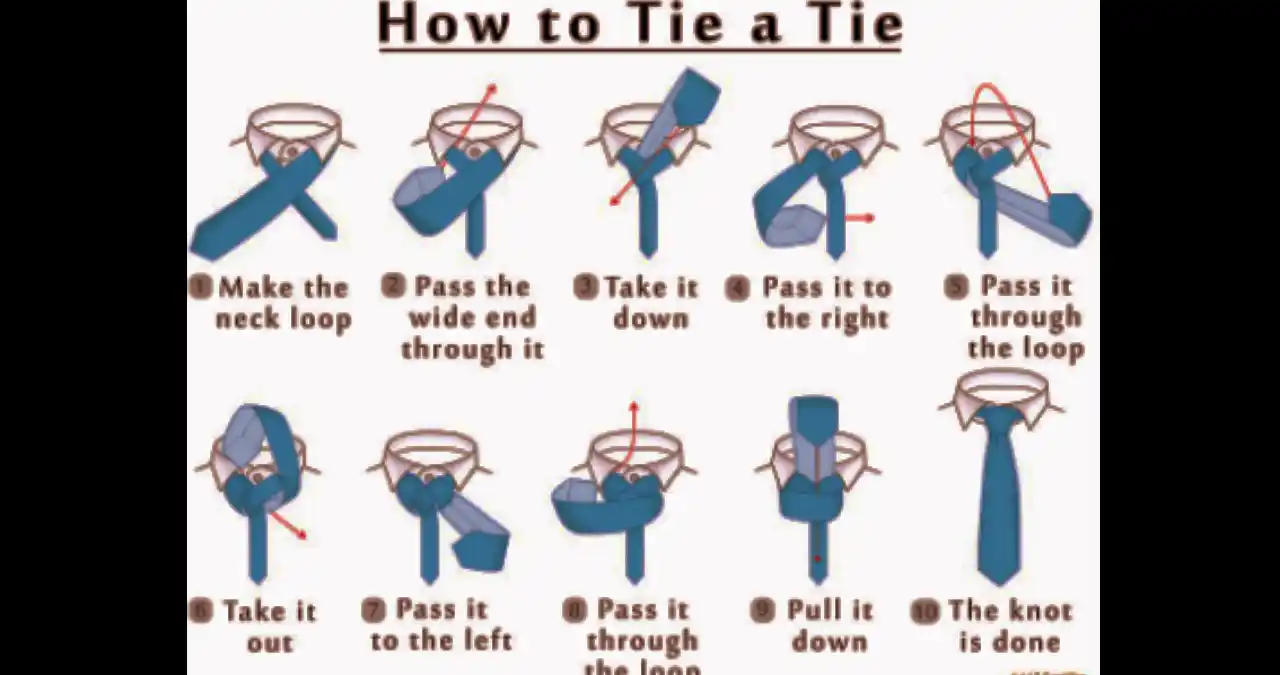
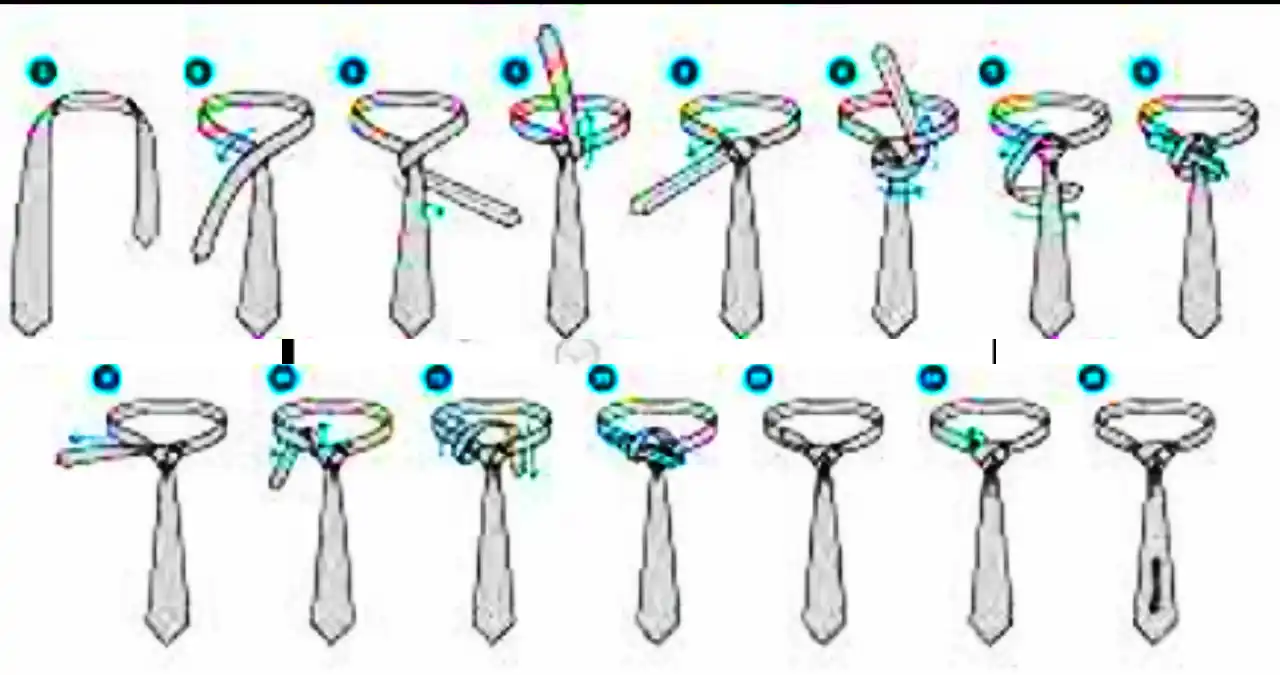
4. The Four-in-Hand Knot
The Four-in-Hand knot is a popular and straightforward option. Follow these steps to tie it:
- Cross the wide end over the narrow end.
- Wrap the wide end behind the narrow end from right to left.
- Bring the wide end horizontally across the front.
- Pass the wide end up and through the loop around your neck.
- Hold the narrow end and slide the knot up to adjust.
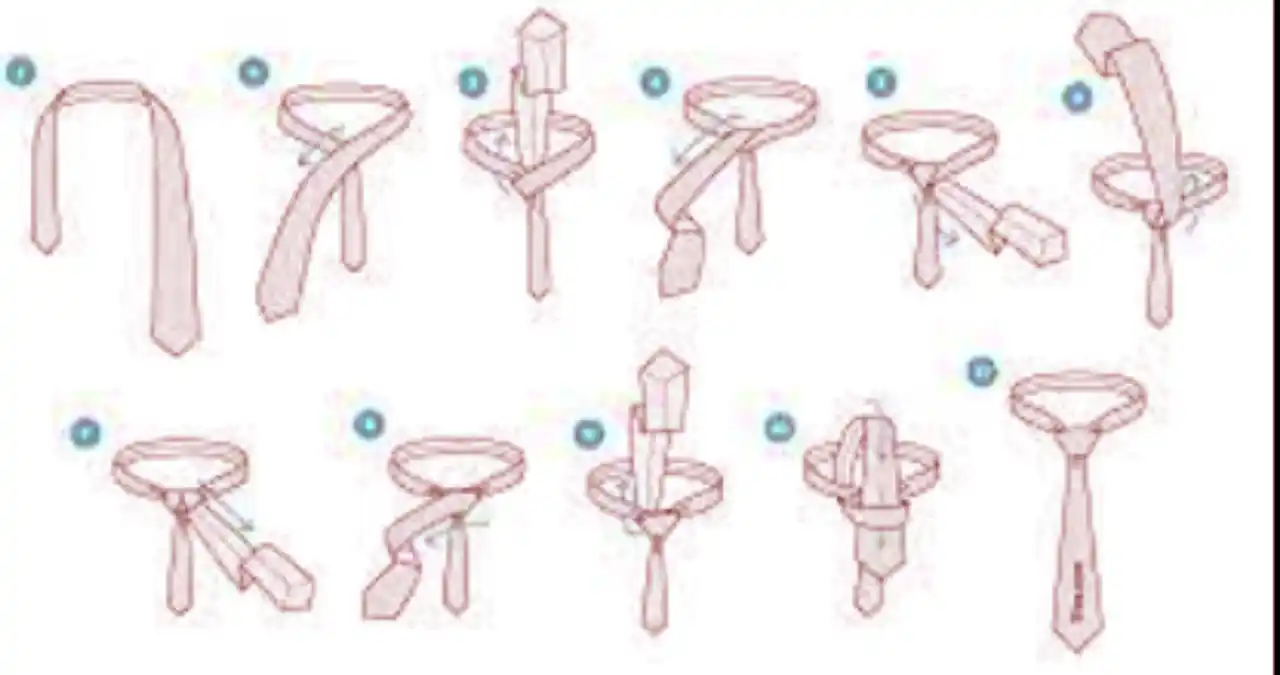
5. The Windsor Knot
The Windsor knot is a classic, full knot that exudes elegance. Here’s how to tie it:
- Cross the wide end over the narrow end, creating an X.
- Bring the wide end up and through the loop around your neck.
- Wrap the wide end behind the narrow end from right to left.
- Pull the wide end up and through the loop again.
- Gently tighten the knot and adjust as needed.
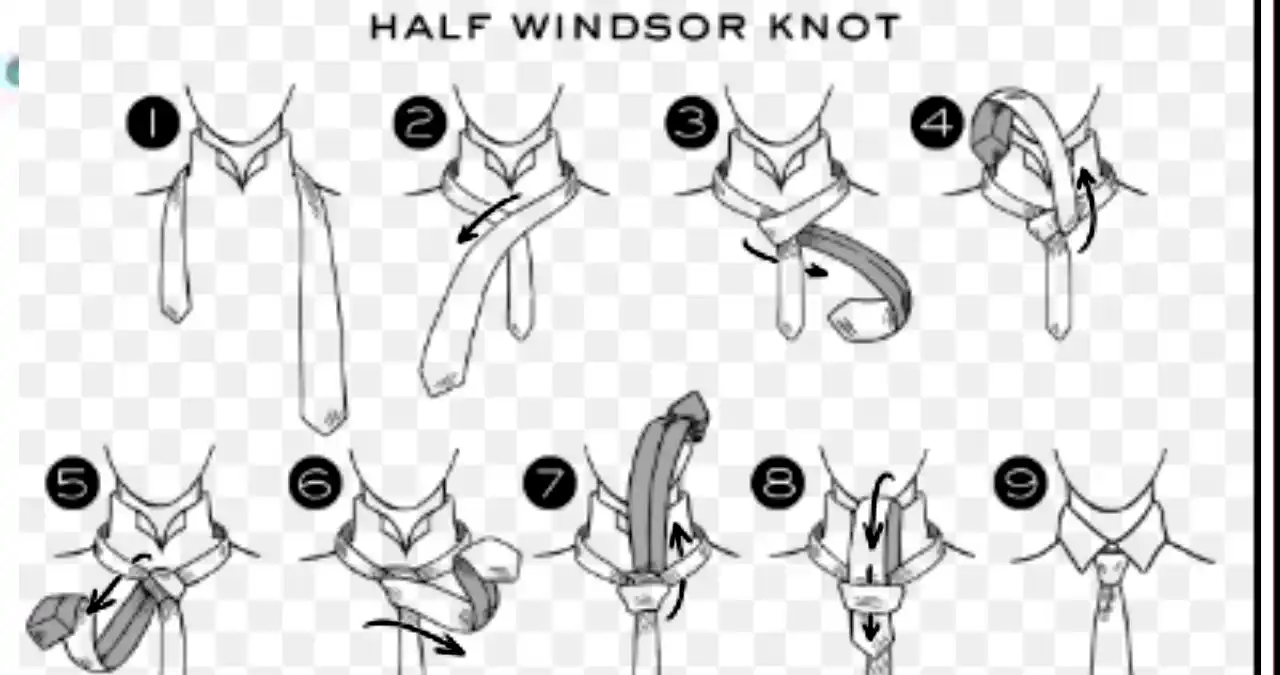
6. The Half-Windsor Knot
The Half-Windsor knot is a smaller version of the Windsor knot, suitable for most occasions. Follow these steps:
- Cross the wide end over the narrow end, forming an X.
- Bring the wide end up and through the loop.
- Wrap the wide end around the narrow end from right to left.
- Bring the wide end up and through the loop again.
- Adjust the knot to your desired tightness.
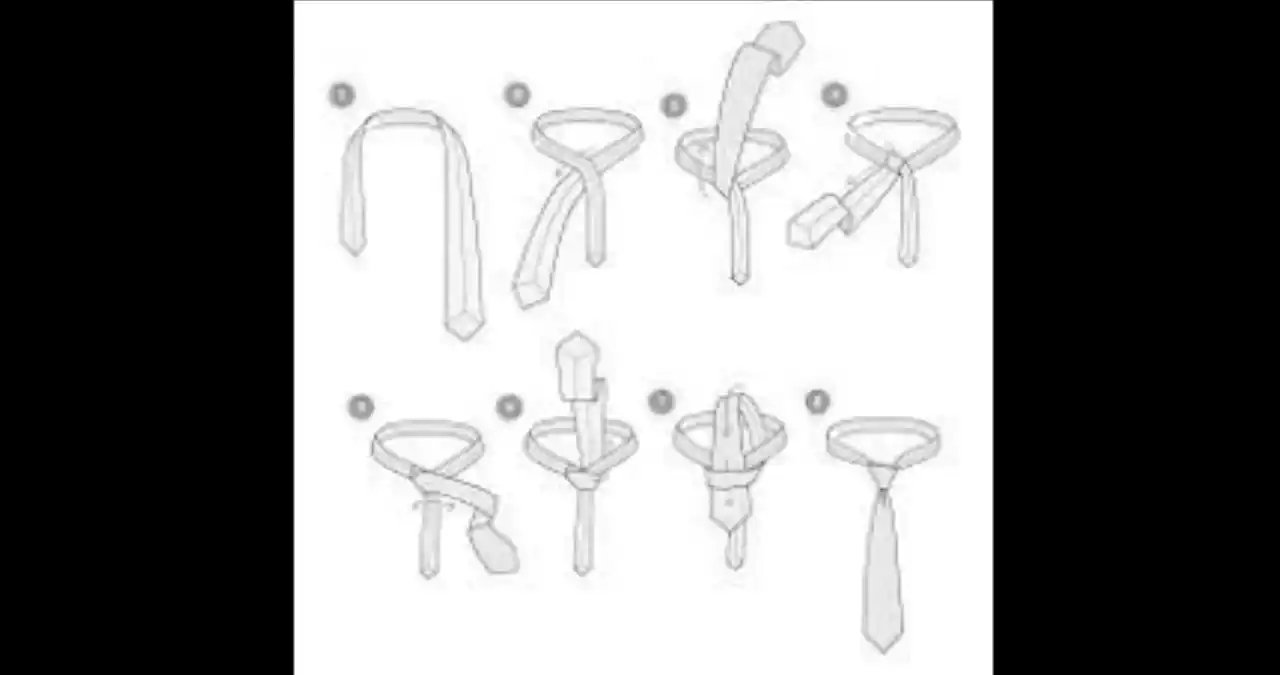
7. The Pratt Knot
The Pratt knot, also known as the Shelby or the Simple knot, is an easy and symmetrical option. Here’s how to tie it:
- Cross the wide end over the narrow end, creating an X.
- Bring the wide end up and through the loop around your neck.
- Pass the wide end horizontally across the front from left to right.
- Bring the wide end up and through the loop again.
- Adjust the knot accordingly.
8. The Eldredge Knot
For those looking to make a bold statement, the Eldredge knot is a complex yet eye-catching choice. Mastering it might take some practice, but the result is worth it.
- Begin with the wide end behind the narrow end, pointing to the left.
- Cross the wide end over the narrow end from left to right, forming an X.
- Bring the wide end up and behind the X, then tuck it through the loop around your neck.
- Take the wide end to the right and pass it horizontally across the front.
- Bring the wide end up and over to the left, then tuck it through the loop and behind the X again.
- Take the wide end and pass it horizontally across the front from right to left.
- Tuck the wide end through the loop around your neck.
- Adjust the knot by holding the narrow end and sliding the knot up.
9. The Bow Tie
For formal events, a bow tie can add a touch of sophistication. Tying a bow tie might seem tricky at first, but with practice, you’ll get the hang of it. Here’s how:
- Place the bow tie around your neck with the ends hanging down.
- Adjust the ends so that one is slightly longer than the other.
- Cross the longer end over the shorter end, forming an X.
- Bring the longer end up and behind the X, then tuck it through the loop around your neck.
- Create a simple knot with the shorter end.
- Take the longer end, which is now on your left, and fold it into a bow shape.
- Hold the folded end and bring the other end, now on your right, over the center of the bow.
- Tuck the end through the loop behind the bow.
- Adjust the bow and straighten as needed.
Conclusion
Congratulations! You’ve now mastered the art of tying a tie, from classic knots like the Windsor to the more elaborate Eldredge. Remember, practice makes perfect, so don’t be discouraged if your first attempts aren’t flawless. With time and patience, you’ll tie the perfect knot effortlessly.
FAQs
- Does the type of tie material affect the knot’s appearance? Yes, different tie materials can influence how a knot looks. Silk ties generally create more defined and elegant knots, while knit ties offer a more casual, textured appearance.
- What knot should I use for a formal black-tie event? The Windsor knot or the Bow tie are both excellent choices for formal black-tie events, depending on your personal style.
- How long should the tie be for the perfect knot? The tip of the tie should ideally reach the middle of your belt buckle. However, this can vary depending on the knot and your height.
- Can I wear a bow tie with a regular dress shirt? Yes, you can wear a bow tie with a regular dress shirt, but make sure the shirt’s collar can accommodate the bow tie’s size and shape.
- Are there pre-tied bow ties available? Yes, pre-tied bow ties are available, but tying your bow tie adds an authentic touch and allows you to adjust the size to your preference.
